Integrating SCCM with vRA to provide a service to build a Windows VM is a very popular request for vRA. Even if your organization is leveraging clones, you may benefit from integrating SCCM or Linux Kickstart with vRA. The primary benefit a consistent and visible service to create guest OS templates that can be used for cloning. This post will cover the integration of an SCCM task sequence that installs Windows 2012 R2 with vRA providing the cloud infrastructure and self service to enable your users to quick produce quality content.
Create a new blueprint that Leverages SCCM
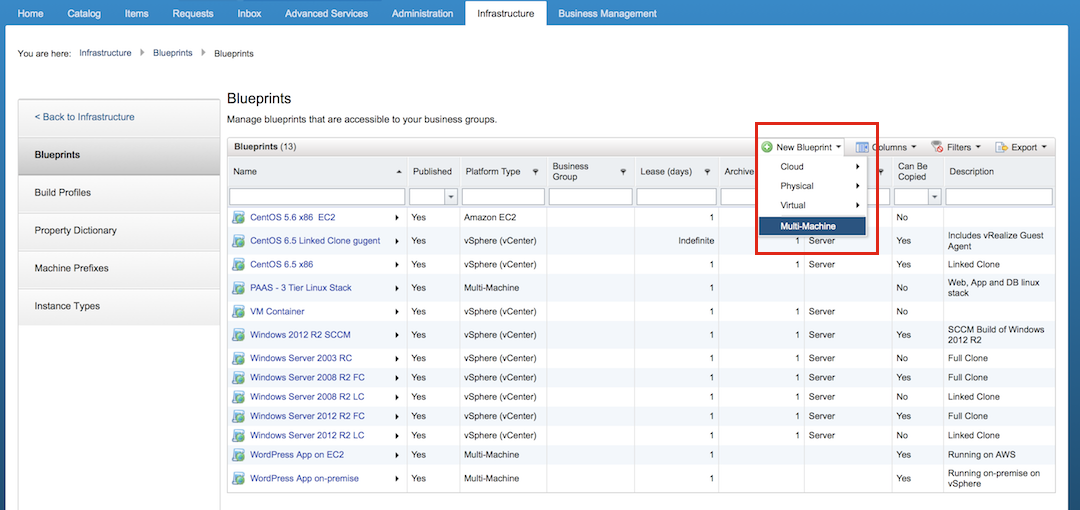
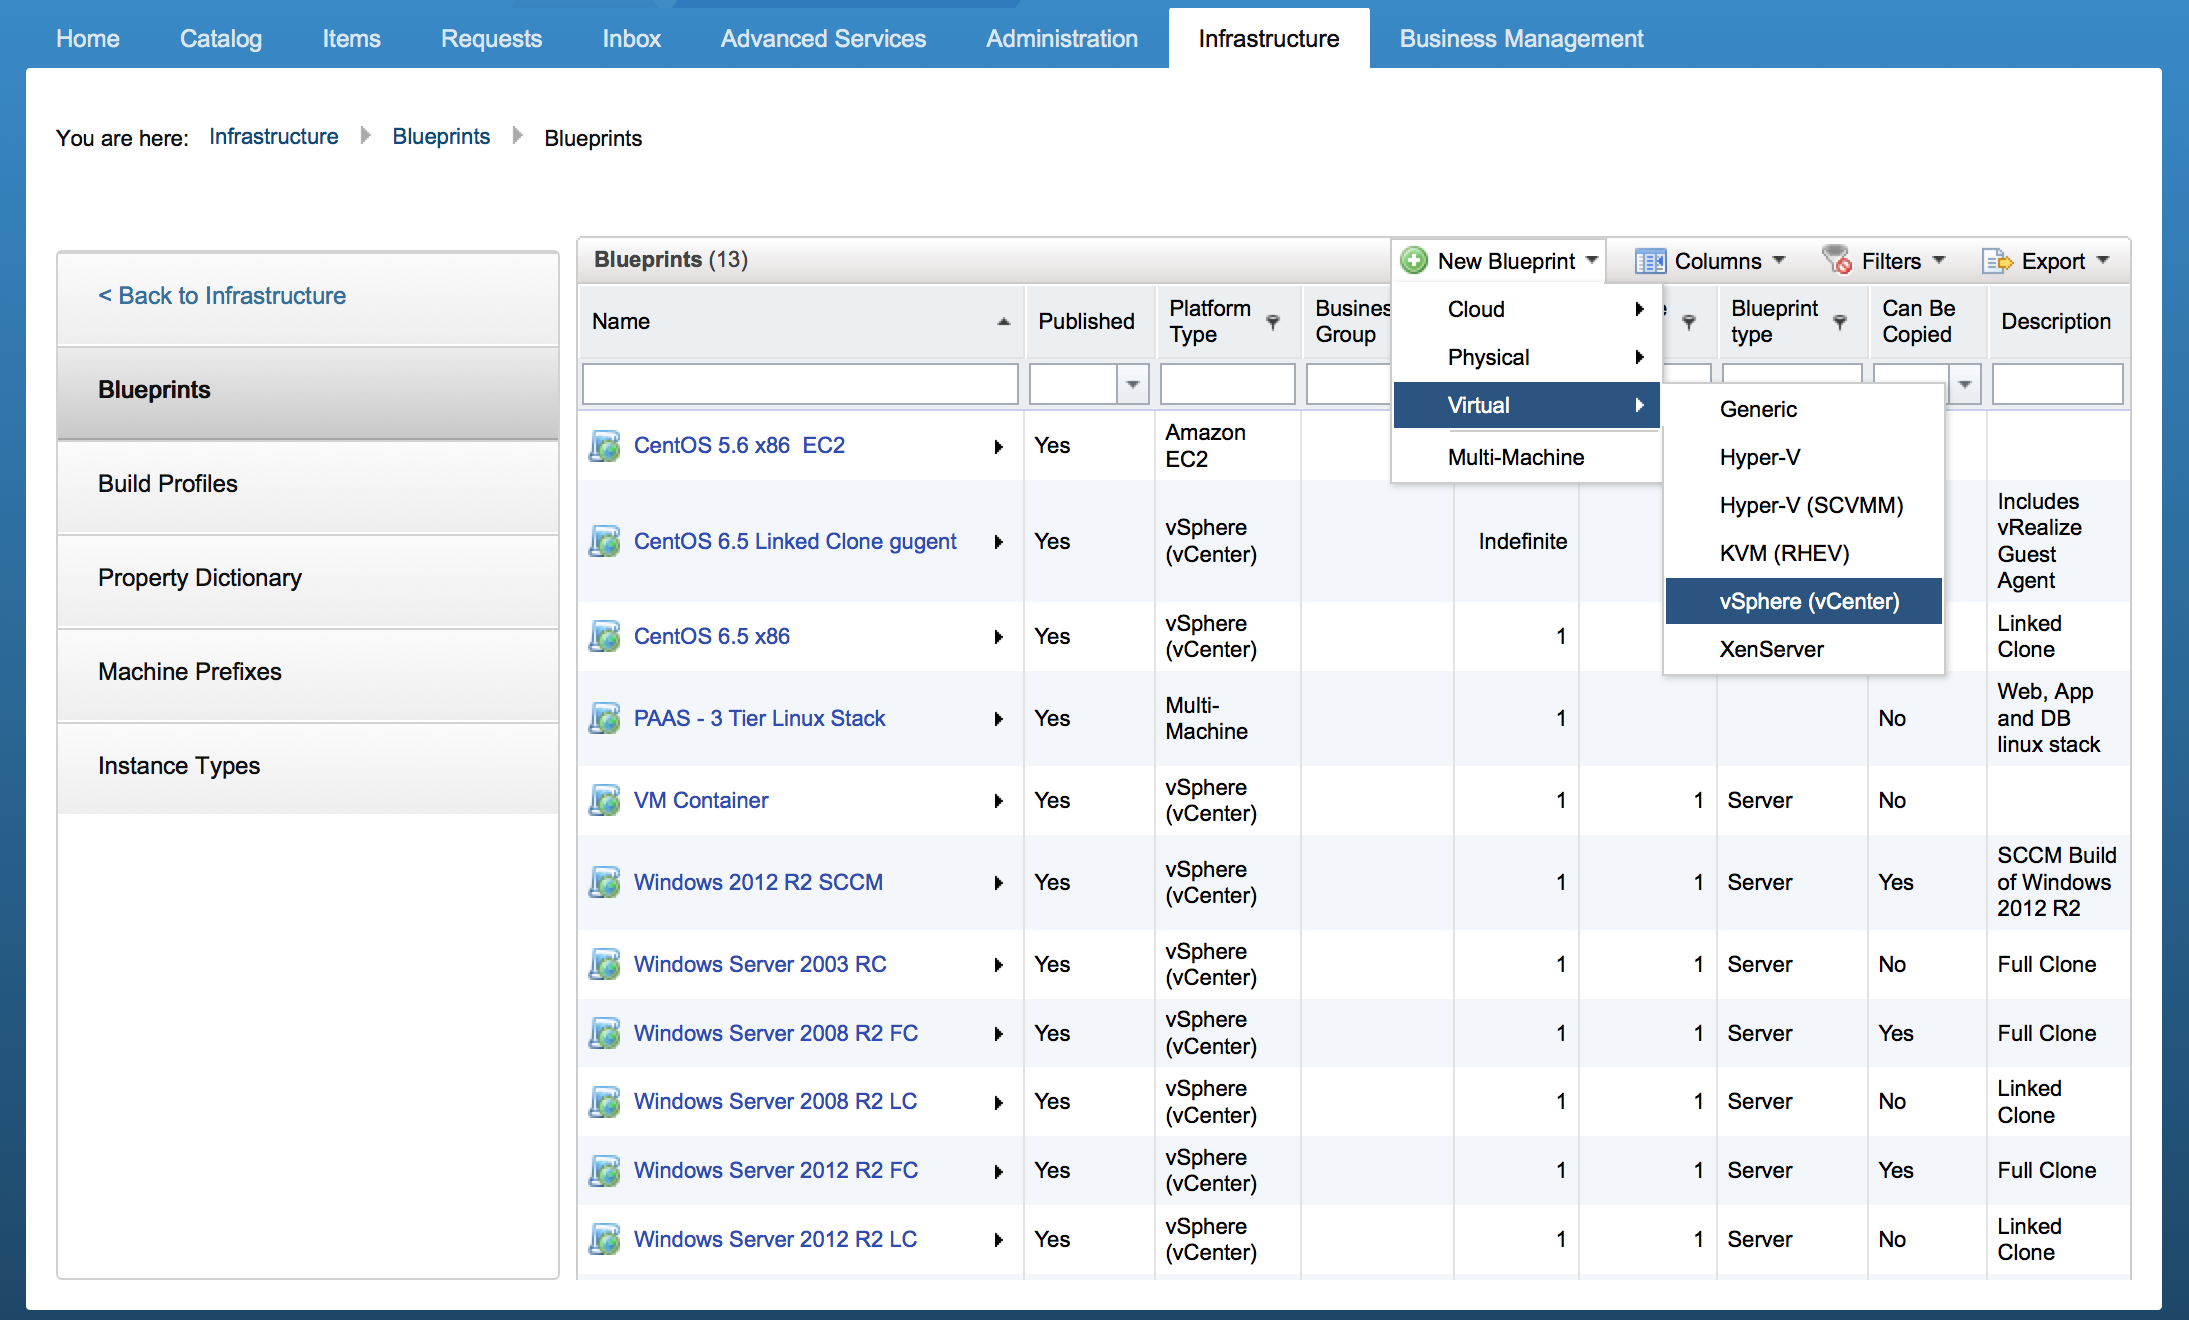
First create a new blueprint. Since we are using SCCM the blueprint could be physical or virtual. For this demonstration we will be using virtual.
Go to the infrastructure tab, blueprints and select Virtual, vSphere to create a new vSphere blueprint that will leverage SCCM.
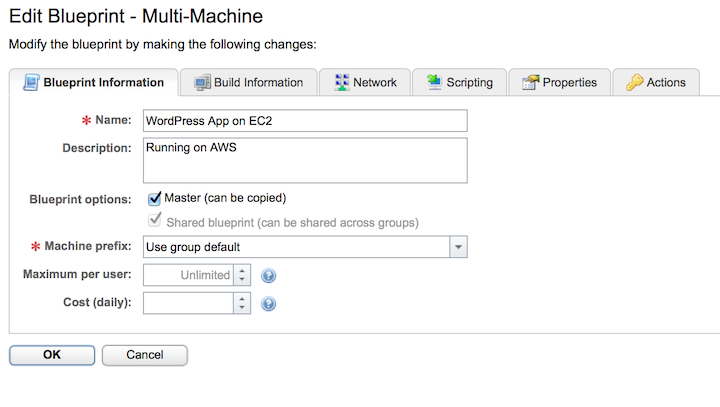
After you name the blueprint, go to the build information tab to specify the type of VM being created along with compute, memory and storage.

1. We are creating a server blueprint that will create a new VM. Since we are using SCCM we will create a new VM and not be cloning a VM. Finally select the VirtualSCCMProvisioningWorkflow as the workflow to create your VM using SCCM.
2. Specify the desired compute, memory and storage values. Note that minimum storage will be based on the volumes that you add using the “New Volume” button. You must have at least one volume specified as the C: volume. Provide a maximum value for storage if you’d like to allow your users to specify more storage at request time.
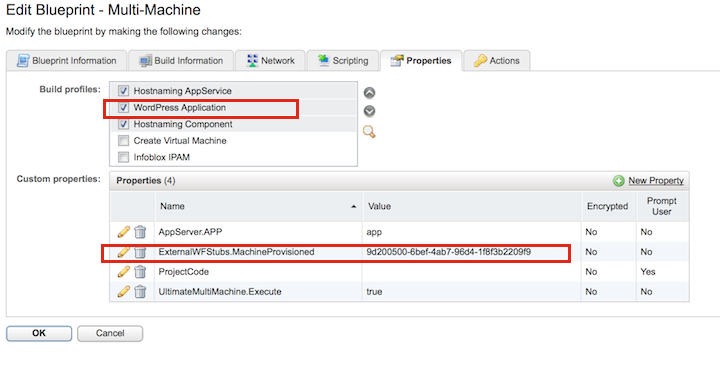
Next you’ll define the properties for the VM by navigating to the “Properties” tab.

Build Profiles and Custom Properties
Note that I am leveraging both build profiles and custom properties.
1. A build profile is a group of properties that may be used across blueprints. vRA contains several build profiles out of the box. For example, there is a build profile that provides default properties to be used with SCCM.
2. The custom properties have scope only to the blueprint. I’ve several custom properties set. Some of the properties are required and others are optional based on your needs.
Required properties:
VMware.VirtualCenter.OperatingSystem: Sets VM hardware settings based on the type of OS being used. In this case I am creating a Server 2012 machine and the property is set to windows8Server64Guest
VMware.SCSI.Type: Required only for Server 2012 R2 machines and must be set to lsilogicsas when creating a Server 2012 R2 machine. By default vRA creates a VM with lsilogicparallel. Server 2012 R2 only provides drivers for lsilogicsas.
Optional Properties:
VirtualMachine.Admin.ThinProvision: Set to true to leverage thing provisioning and save on storage. If not specified, the VM is created as thick.
ExternalWFStubs.BuildingMachine: Sets the vRO workflow to be run when building the VM. In this case I am calling a vRO workflow that allocates an IP address from an IPAM system.
ExternalWFStubs.DisposingMachine: Sets the vRO workflow to be run when destroying the VM. In this case I am calling a vRO workflow that gives back the IP address requested from IPAM when building the VM.
To view the properties included with a build profile, select the “Build Profiles” button on the left hand side of the screen. The build profiles screen allows you to view existing build profiles and create new build profiles.
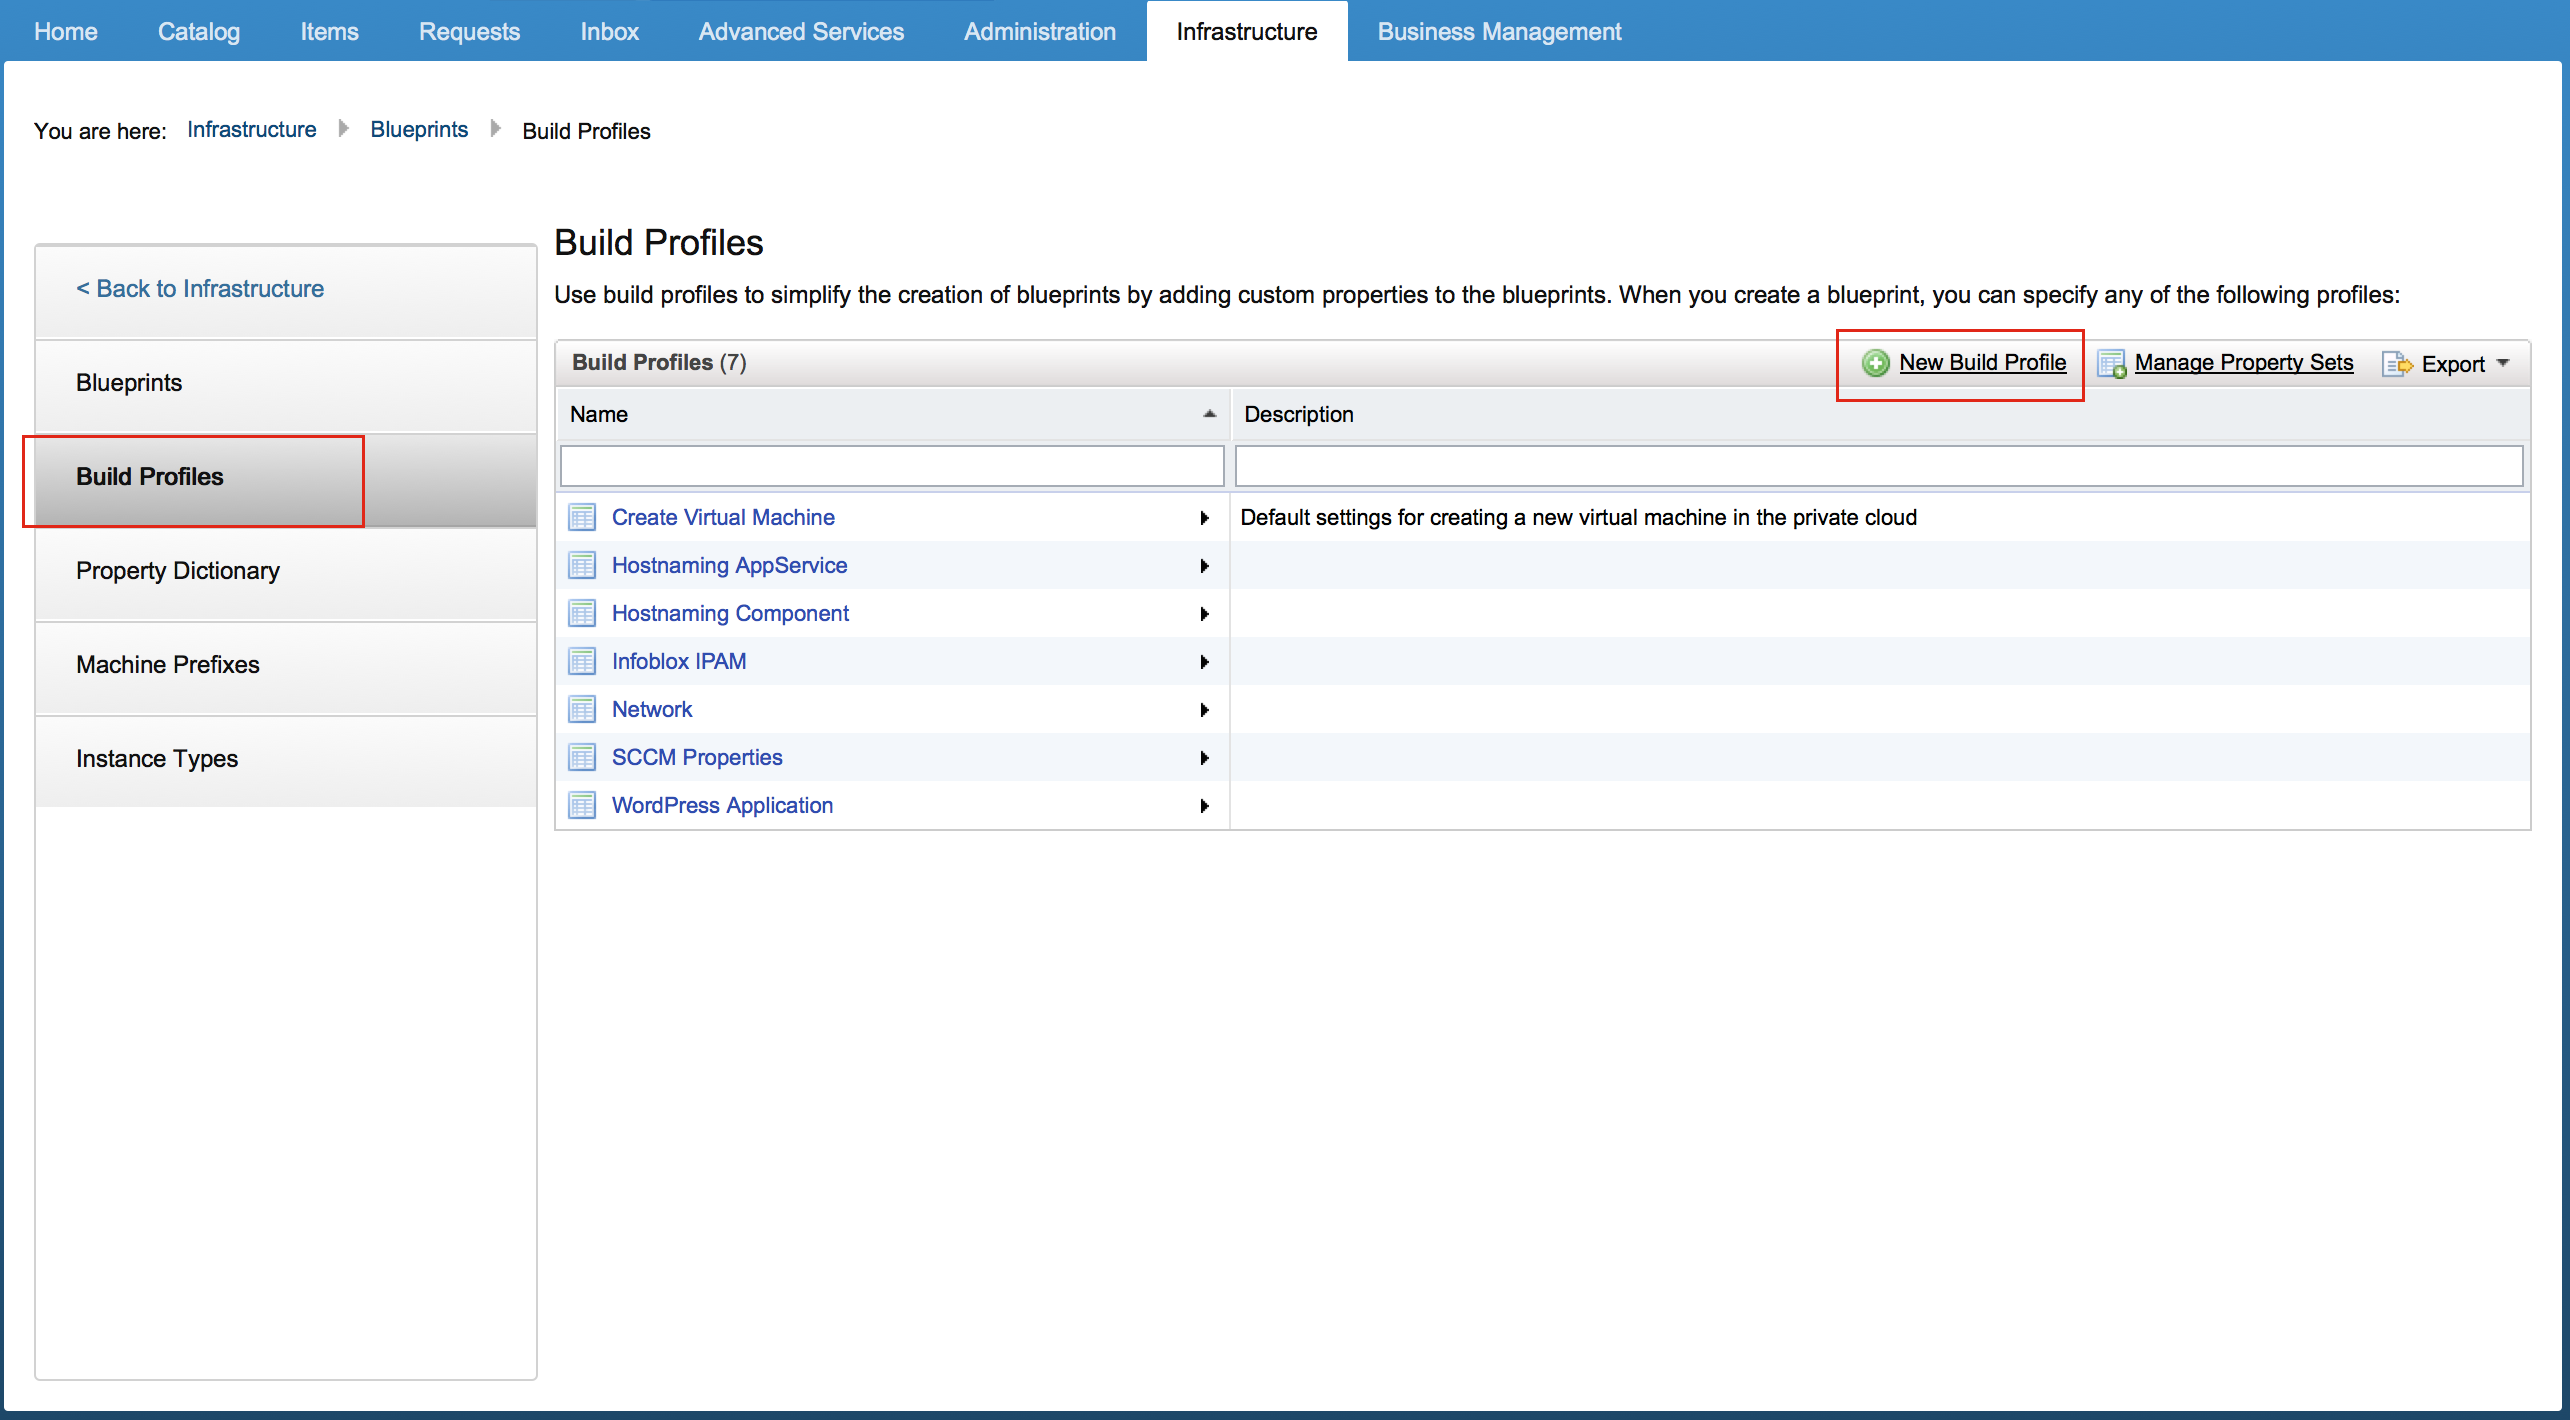
To create a new build profile, select “New Build Profile”. Provide a name for your build profile. You may either create a build profile on your own or leverage existing build profiles using the “Copy from existing build profile” option. When copying from an existing profile, you notice that vRA includes many useful build profiles right out of the box. vRA does provide a SCCM build profile and we will leverage the out of the box properties.

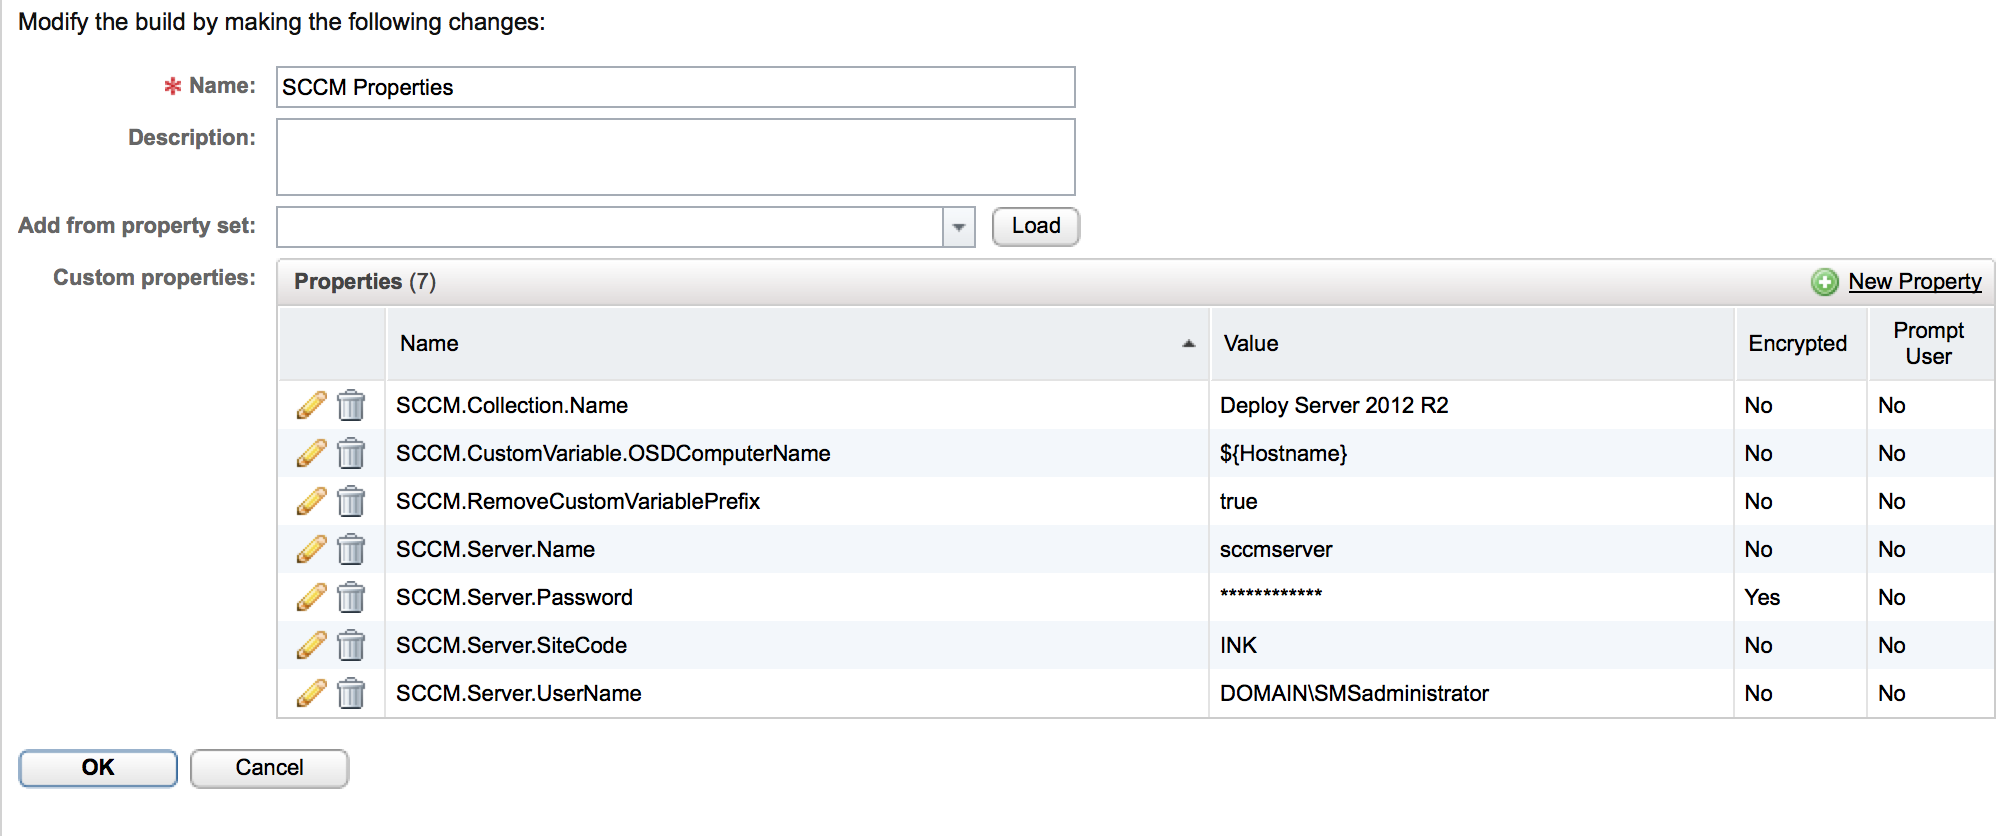
After selecting the existing SCCM build profile we simply set the values based on our environment. Note that if you want to allow users to alter settings at order time, simply set the property to “prompt user”.
Modify the SCCM Task Sequence to install the vRA guest agent
Prior to publishing your blueprint for consumption, you must add the vRA guest agent to the SCCM task sequence. The vRA guest agent gets installed by SCCM and then reports back to vRA that the task sequence is complete.
Download the vRA guest agent from the vRA server. The guest agent can be found on your vRA server at the following URL:
https://vra-server:5480/installer/
Unzip the vRA guest agent to a location on the SCCM server. Note the SCCMPackageDefinitionFile.sms file will serve as the definition file when we create the installation package.
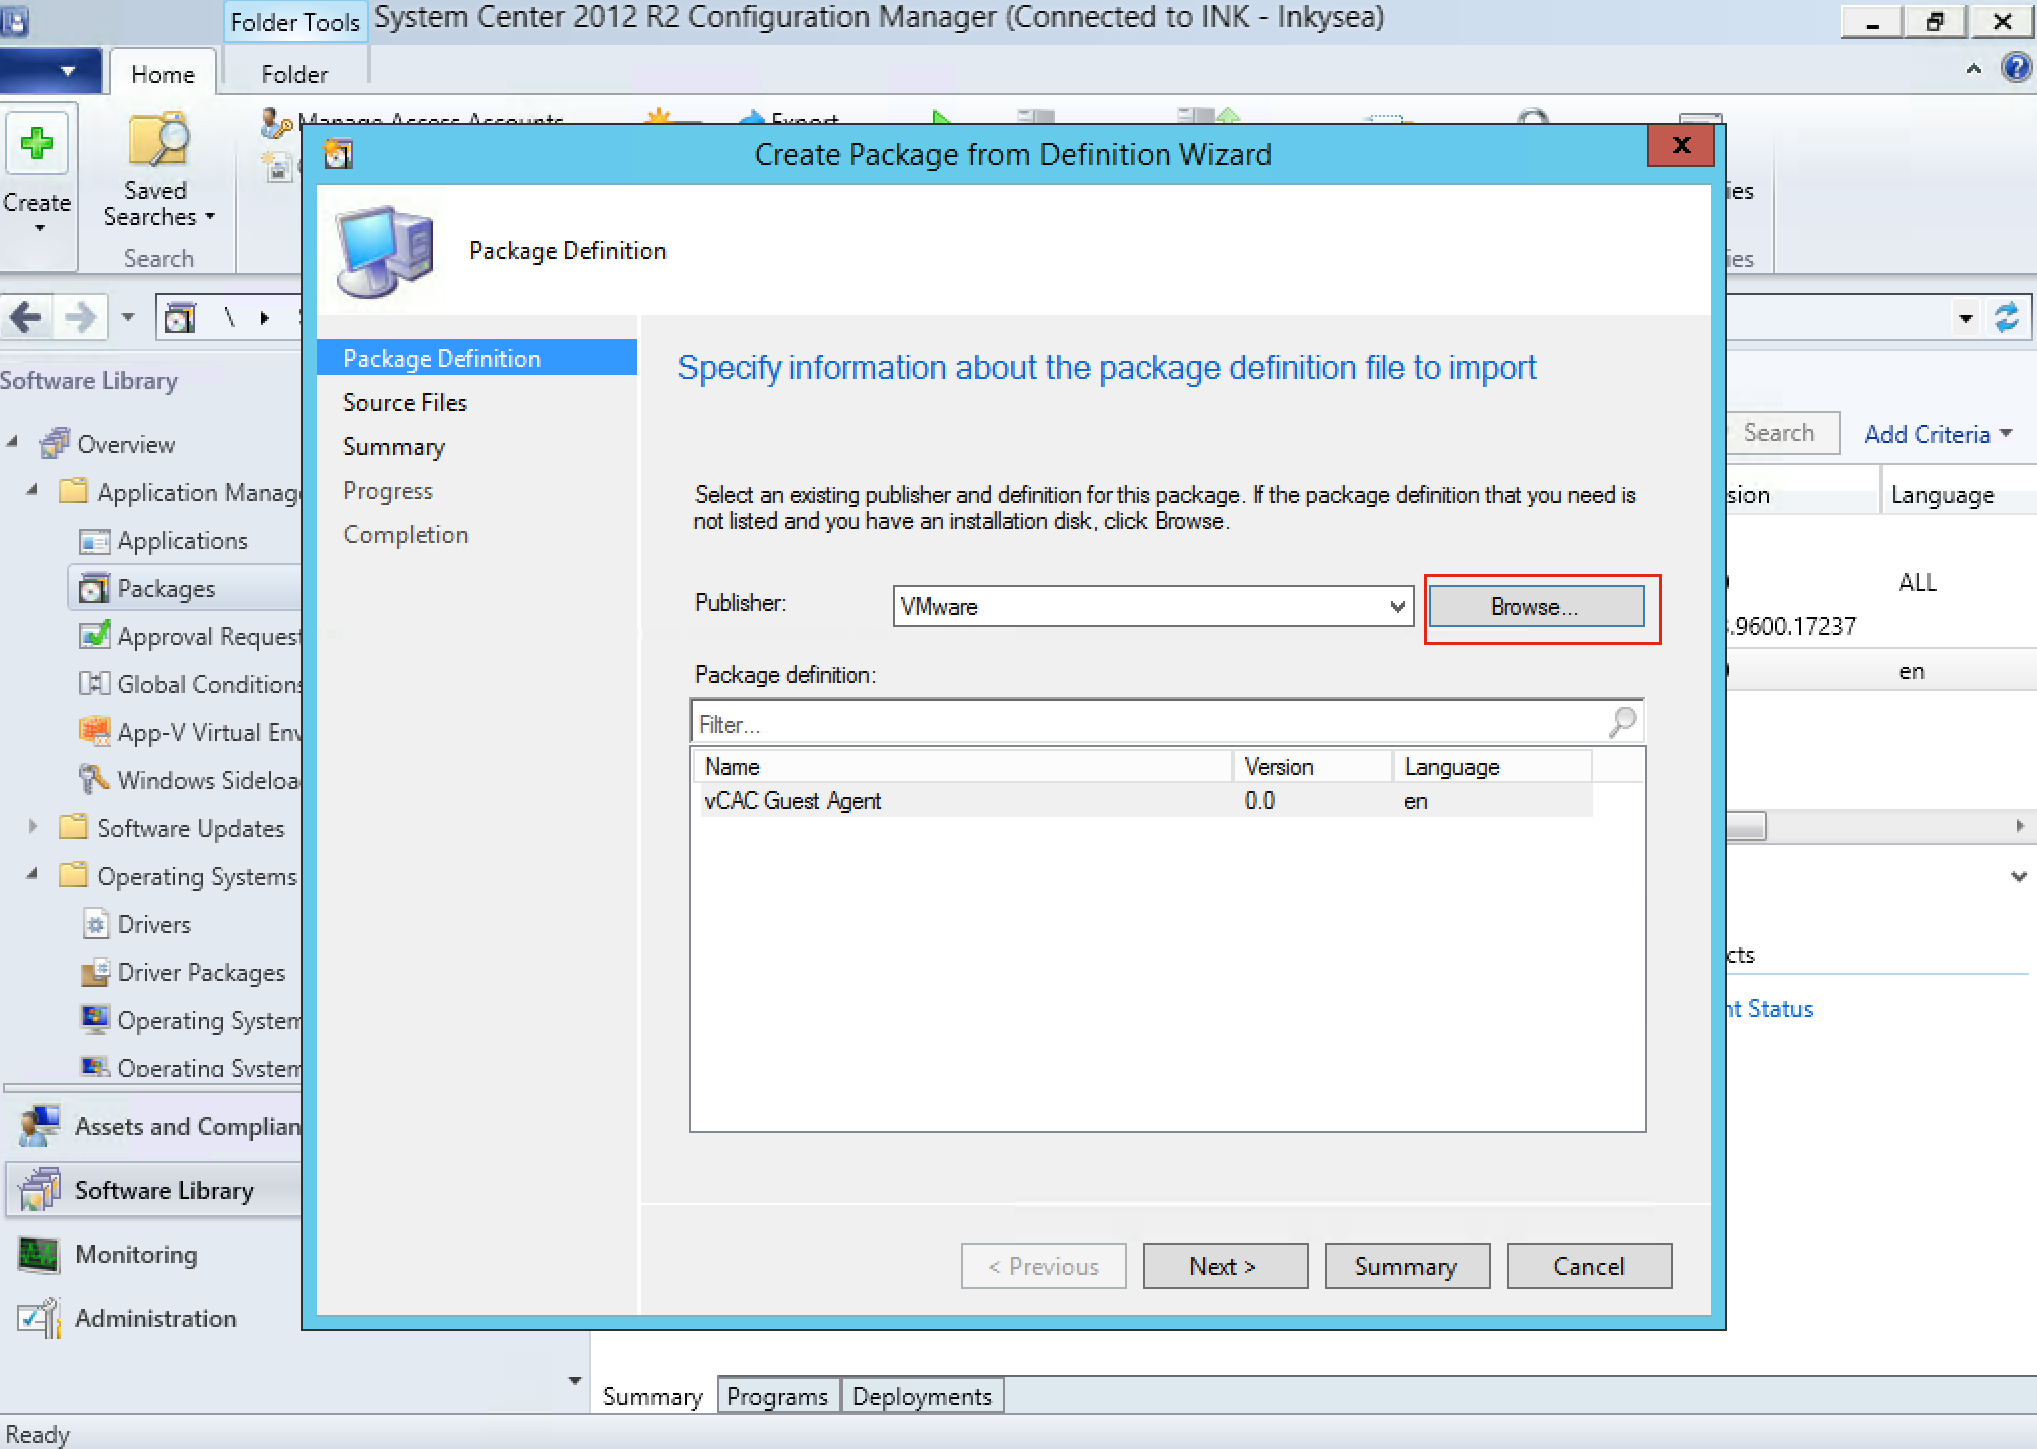
Create an SCCM package for the vRA guest agent. Ensure that you are creating the package using the “Create Package from Definition” option. Use the browse button to select the SCCMPackageDefinitionFile.sms file.

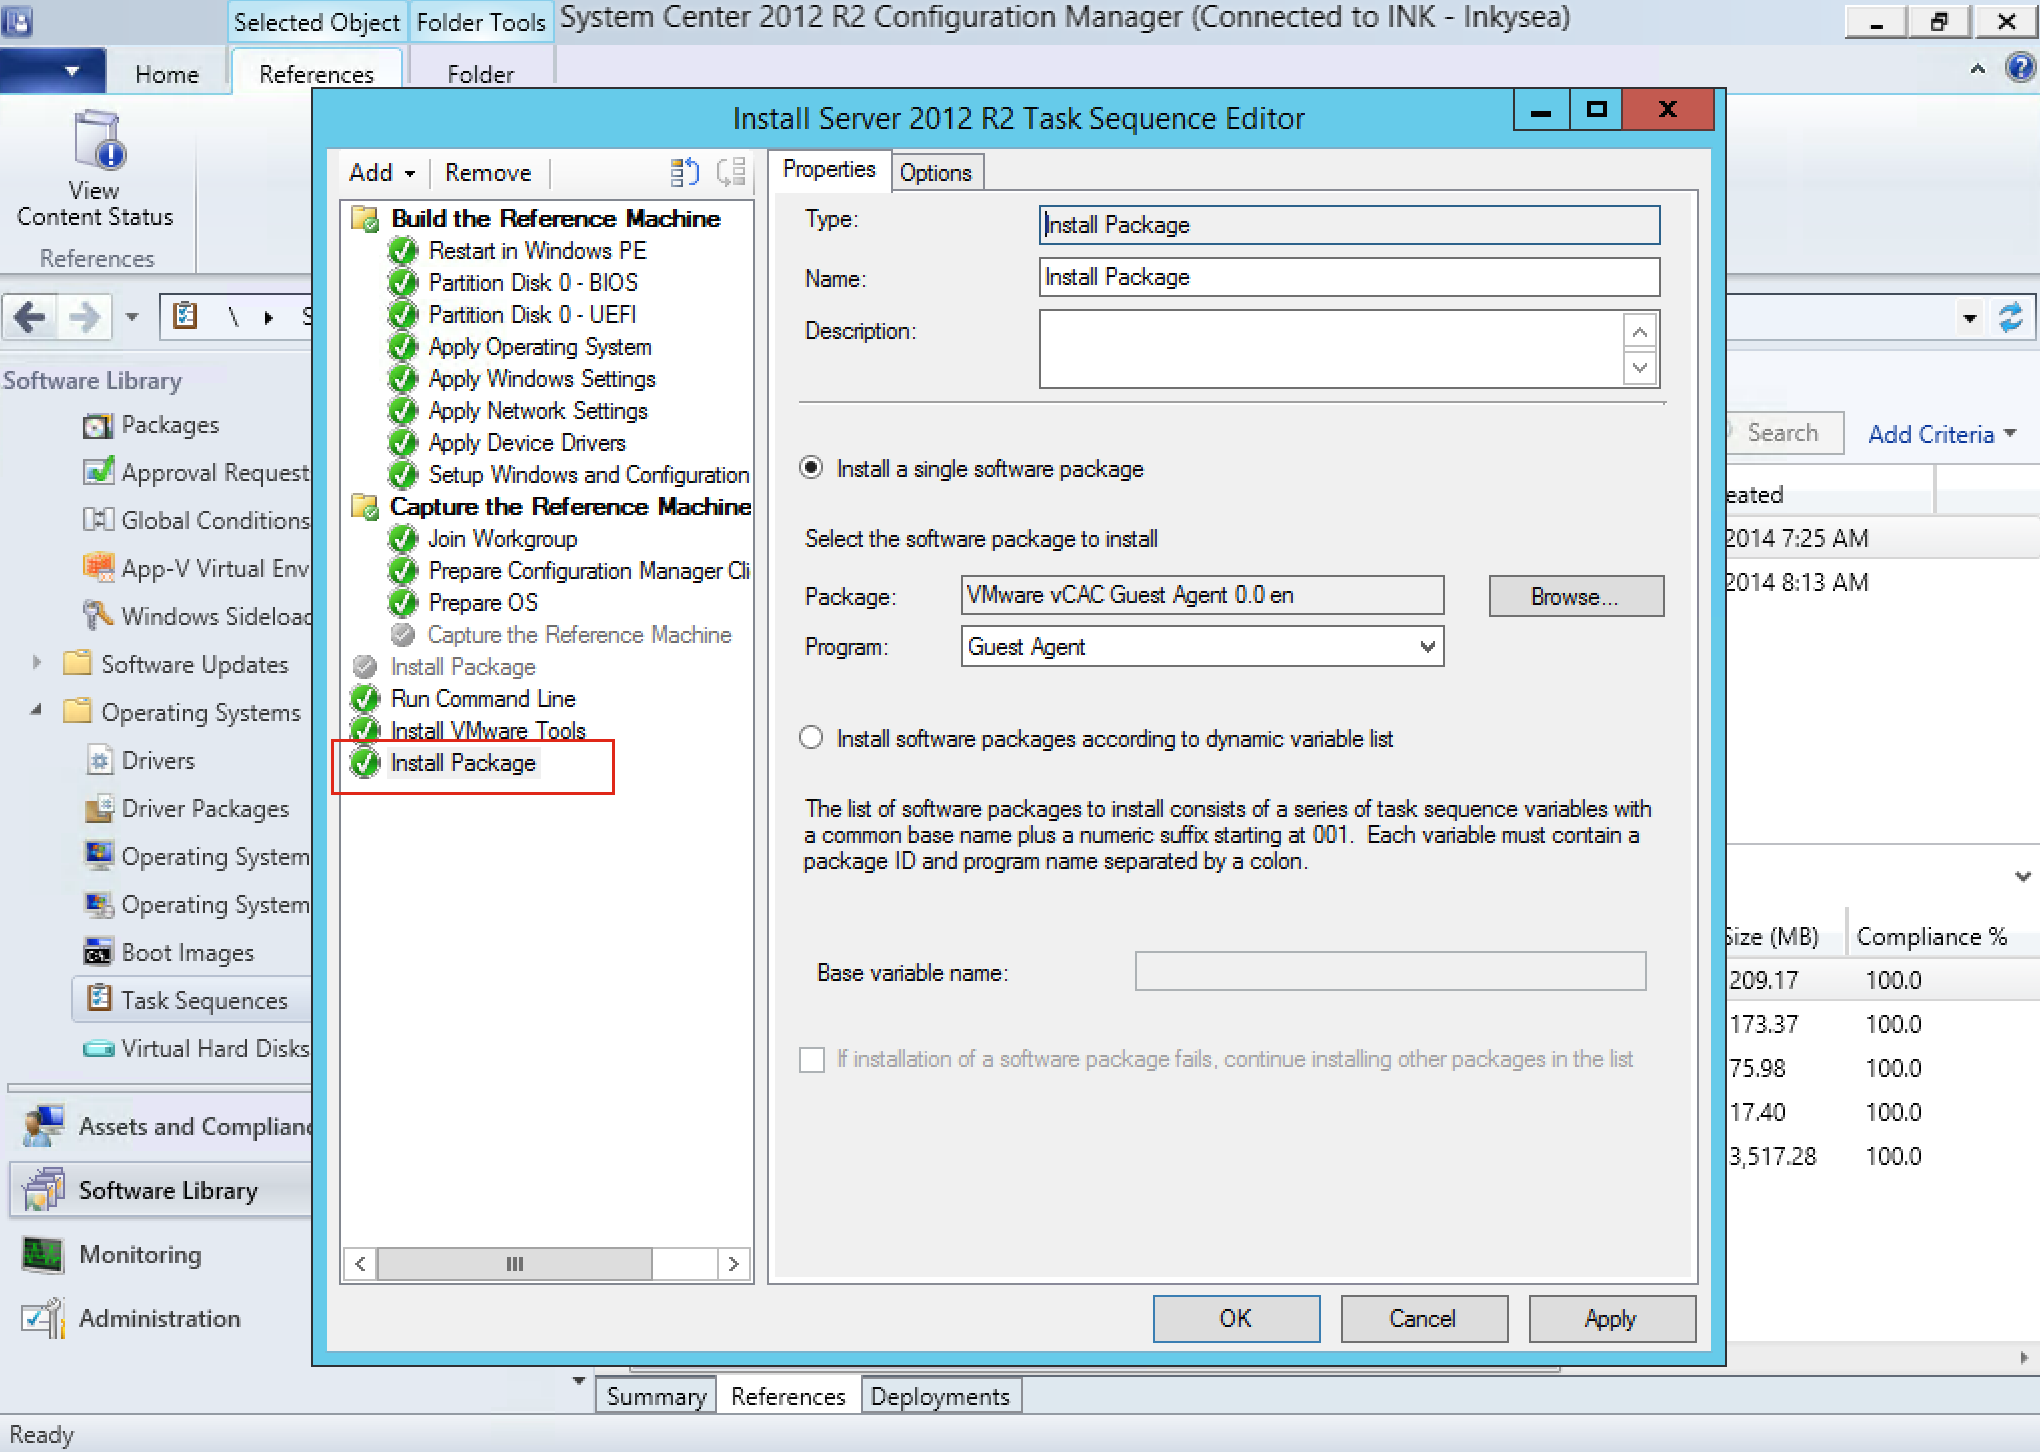
Add the vRA guest agent package to the end of the task sequence using “install package”.
We’ve now created the SCCM blueprint and configured the SCCM task sequence to install the vRA guest agent. The blueprint can now be published and consumed by our users.